
Drawing in a museum is a way of slowing down and experiencing artwork on a nonverbal level. In this article, I seek to describe an approach to thumbnail sketching that will make drawing in a museum a more accessible practice to beginners as well as experienced artists. As an artist and a drawing teacher, I am consistently surprised by the way sketching transforms perception; when I draw from a work of art I actually seem to see it differently, and my students report the same.
My approach to thumbnail sketching hinges on three steps: 1) mapping the basic shapes, 2) noting the light/dark value pattern, and 3) finding some detail. While you may enjoy doing all of these steps in sequence, any one part of this activity can be satisfying and can change your relationship to the piece of art.
This method of thumbnail sketching is intended as a tool for perceiving and enjoying the art with more parts of our brain and body, rather than to producing a particular outcome. While I hope you are pleased your drawings, I encourage to you embrace the process over the product and to fill up your sketchbook.

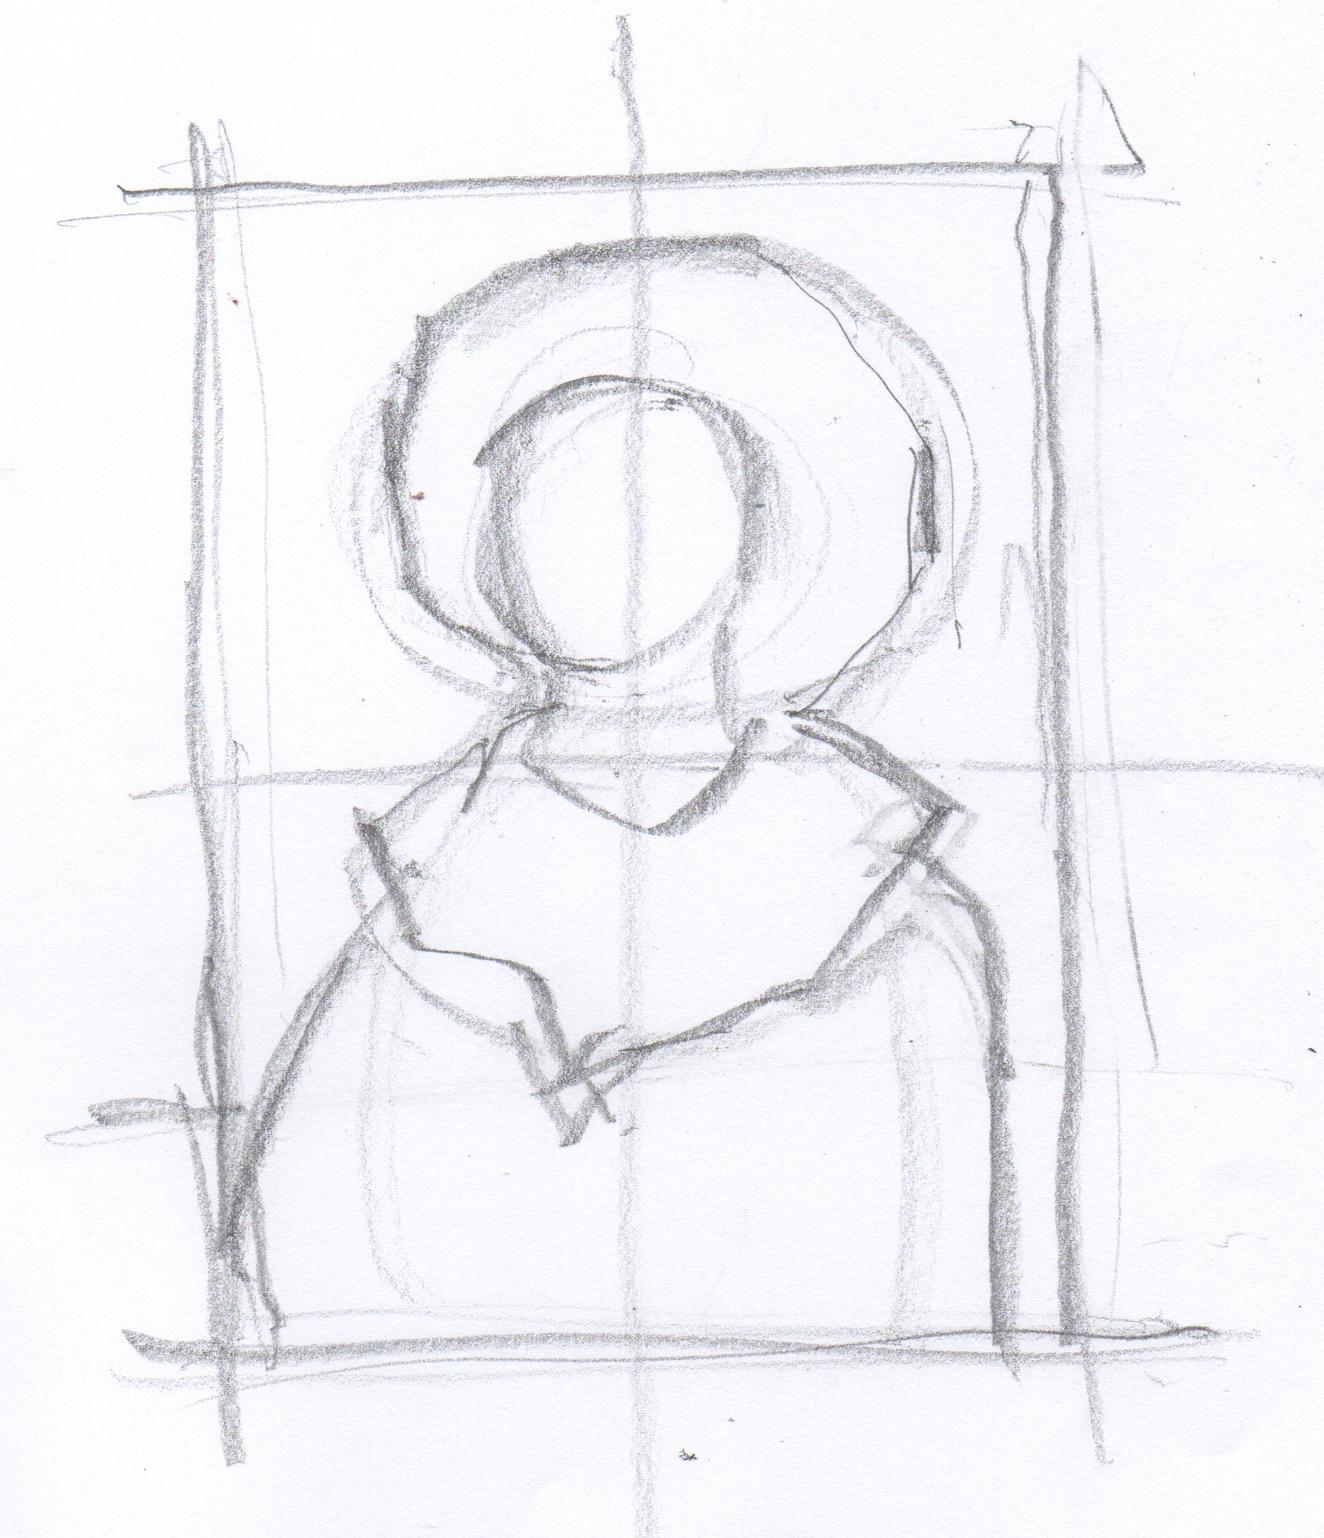
Thumbnail sketching, Degas’s portrait La Savoisienne. The materials you’ll need are a pencil, an eraser and a sketchbook in a size you’re comfortable with.
Is this piece vertical or horizontal? This portrait by Degas is vertically oriented, so I draw a vertical rectangle.
Determine the proportions. This can be done by measuring or estimating. (If measuring makes you want to run screaming from the museum, then skip it and estimate instead.) When measuring, it is important to keep your elbow straight so that the length of your arm remains consistent each time you take a measurement. It is also important that your pencil is running parallel to the surface of the subject, rather than at an angle that could change each time you measure.

I measure the width of the painting and compare it to the height.


It looks to me as though the height is roughly one and one third of the width. My initial rectangle wasn’t as tall as I’d like, so I adjust that.

Then divide the rectangle into rough quadrants.

Make a gesture drawing. Using a light touch, reduce what you see into a few simple lines. I have sketched a shape for the headdress and body.


Find the simple shapes in each quadrant. Our aim is to reduce what we see to basic shapes without detail.
Again, a light touch is helpful, as we will be building on this structure.

Look for the simple shapes: Where are they in the quadrants?

What are the spaces between the figure and the edges of the picture? In this example, the space between figure and the side of the composition is different on the left compared to the right. There is a little space between the top of her bonnet and the top of the composition, with more of her head and bonnet in the right upper quadrant than the left. There is more of the bonnet on the right of her head than the left.

Look for more shapes, I see that the vertical midline of the composition seems to go through the eye on the right, so the features of her face appear more to the left of the vertical midline. Her chin is just above the horizontal midline and just below the bonnet.
Why have I left out the facial features?
When I squint at this picture, what strikes my eye is the overall light/dark pattern and the overall proportion of the pictures. I want to establish these proportions on my page, as an underlying armature, before I add details.

As I draw, I notice the chin is lower than I thought, and how big the bonnet is. Working from the top of the picture down, I take in the light and dark part of the bonnet and the shape of her hair, and note that her face is smaller than I originally thought.

Relating the parts to one another. Notice how shapes relate to one another across the quadrants. I re-evaluate the shape of her collar and draw a line to represent the vertical centerline of her face.


I have added
- A horizontal line that curves around her face. Her eyes will fall on this line, which looks to be about halfway between her chin and the top of her hair as we see it, then the same distance to the top of the bonnet.
- A line representing the vertical center of her body, marked by the center of her collar at about the clavicular notch and following the sternum and center of her garment.
We see more of her right side. There is a little space between the arm at our left and her body, with no such space visible on our right.
STEP 2: Simplifying into Three Values
The white of the paper serves as the lightest value. Add a middle and darkest value.

Look for the value pattern. Squint at the painting to get an impression of the overall value patterns. Ignore detail—we are translating subtle information into gross generalizations.
Leaving the lightest parts of the painting alone, shade in the rest of the picture gently using the side of your pencil. I see the lightest parts of the picture as the headdress and all of the collar. I leave these lightest parts the color of the paper itself.

Look for the darkest parts of the painting, then shade those in, too.
Now that I have translated the painting into three values (light, middle, and dark), I look for distinctions within those areas. I differentiate between the lighter and darker parts of her bonnet, face, neck, collar, and dress, then add the dark line of her necklace. The eraser helps to regain the light parts.


STEP 3: Finding Detail
The next step is to look for more detailed information.
The dark spots that represent lace on her collar stand out for me along with shadows cast by the folds, and now I pick out more specifics about the contour of the collar.

Using the horizontal eye line, I plot her eyebrow line, nose, and ear.


I notice that her head is tilted back slightly, so I adjust the angle representing the midline of her face. I erase out the light portion of her forehead and adjust her ear, moving it farther to the right.

Now I go in for the features.
I want to make sure to leave enough room for the chin, so I work from the bottom up, drawing a small line for the top of her chin under her lower lip and a line where her lips meet, with a bit of shadow representing the upper lip. I draw the dark of her irises and erase to the left of the face and the right, to widen it. I look at the nose more carefully. It’s worthwhile to note that I remain focused on the values, and I do not outline the lips or eyes.

Next, I raise the chin a bit so that the lower lip is smaller. I widen the face and hair still more, define the eyebrows, define the upper lid on the right, draw some detail in the bonnet. I turn up the corners of her mouth while trying not to exaggerate the upper lip.
In drawing the features, I have enlarged them in proportion to the rest of the picture, a hazard in general. I think I had better leave well enough alone now.


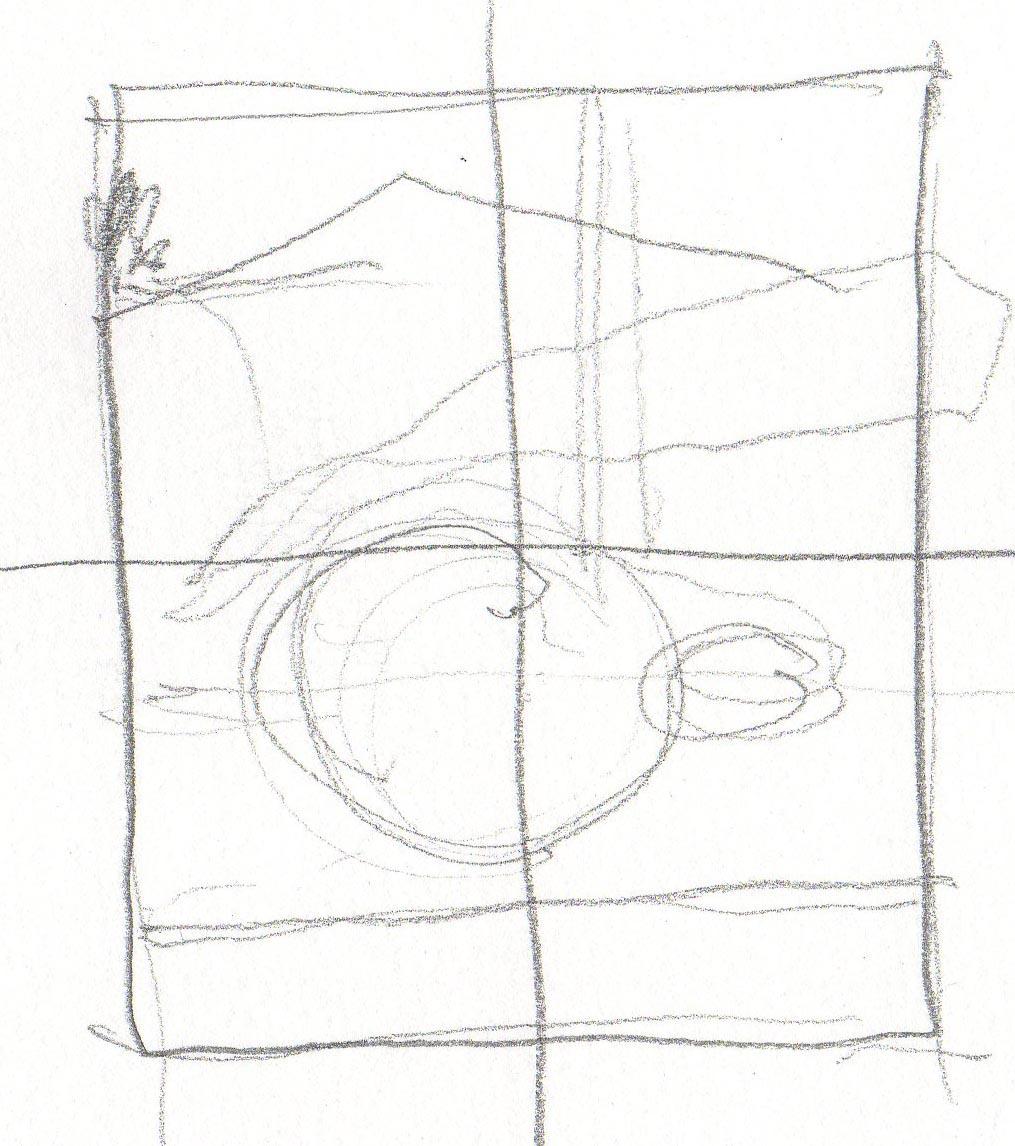
Thumbnail sketching: Van Gogh’s View of Auvers-sur-Oise.
I begin with the proportions of the composition, divide it into quadrants, and map the basic shapes. This piece differs from La Savoisienne in that it is horizontally oriented and, to my eye, can be broken down into three shapes; yellow field, buildings and trees, and sky. The buildings and trees group together as darker than the sky, which is darker than the field in the foreground, which I’ve left as the light of the paper. It is this value pattern that drives my thumbnail sketch.
Now that I have a rough idea of the basic proportions, shapes, and values, I look for smaller shapes and more subtle value distinctions. I find the trees to be the darkest parts of the picture, and describe some variety of roof shapes.
Vincent van Gogh, View of Auvers-sur- Oise, 1890. Given in memory of Dorothy Sturges by a friend

STEPS 1 - 2 - 3: Mapping simple shapes and establishing three values, then finding detail.

Thumbnail sketching: Matisse’s The Green Pumpkin is an interior still-life with a landscape seen through a window. Once again, the challenge is to simplify complex visual information. I do so by identifying the proportions, simple shapes, and basic values, then I add more detailed line work.
PS DM 4
STEP 1: Mapping Simple Shapes
STEP 2: Establishing Three Values

STEP 3: Finding Detail


Thumbnail sketches with watercolor added later.


Margaret Owen is an artist in Providence, Rhode Island. She teaches drawing at the RISD Museum.